Hi, I'm Martin and I'm working as an automotive technician and ADAS expert for Pilkington. ADAS (= Advanced driver assistance systems) are installed as standard equipment in cars nowadays and need to be re-calibrated after a windscreen replacement. With ReCO™ (= Remote Calibration Overair), we support you in ADAS calibration: we unlock security gateways and perform incoming diagnostics, troubleshooting and calibrations remotely for you. Additionally, I want to share my know-how and experience from my daily business in this blog with you. Have fun reading it!
Initial Diagnosis - Understanding the Problem
You've probably experienced the following situation yourself. Your customer hands over his vehicle for a glass replacement and complains about scratches or technical defects after the work is done.
The best way to avoid this issue is to run through an initial diagnosis and check-in with the customer. Sounds complicated? It isn’t!
 Chat with the customer (check-in):
The first thing is to find out if there are any technical issues with the vehicle in advance. This is especially important with ADAS. For example: Are there problems with the steering? Does automatic wiping work? Do indicator lights light up while driving? A quick chat with the customer can give you a lot of information.
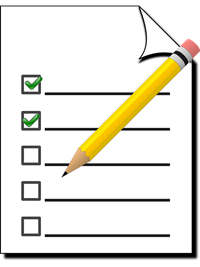
Visual Inspection
With the customer, carry out a full inspection of the vehicle for any scratches or damage. Also check the tyre tread and the condition of the rims. Damaged rims or worn tyres can be signs of a misaligned track, which can lead to system failures after calibration. For more details, you can use the checklist at the end.
My advice:
Include the visual inspection in the check-in. During the consultation, actively draw your customer's attention to any defects and use the opportunity to agree on follow-up orders. Maybe your customer needs more than a new windscreen?
Electrical Testing
Two things to check here. First, read out the faults registered. This is the meat and potatoes of every diagnosis because it enables you to demonstrate to your customer or an insurance company that the problem already existed before the repair. Make sure you save these as a backup. Secondly, check the function of the rain sensor.
Test Drive
Once you've taken a backup of the faults you can delete them and take a test drive. For preference do this with the customer. Check for driveability, especially with the ADAS. After the test drive, check the fault memory again to see if there are still faults registered that could be relevant. If there are, you may need to carry out some preliminary work.
Final Summary
Once you've gone over all the problems and issues, write them onto the workshop order. The customer can sign this along with the order confirmation. That way you and the customer know about any pre-existing defects that you aren't responsible for. Putting some time into the initial diagnosis of the problems can save a lot of time and trouble. This approach also tends to leave a good impression on the customer.
Six Things to Check During Visual Inspection
1 - General Condition of the Bodywork:
Check if any bumps or dents can be found to exclude damage to the radar. The radar for ACC (adaptive cruise control) is installed in the front bumper of most models.
2 - Tyre tread:
Each tyre should be evenly worn all around. If a tyre tread is worn down on one side, this means that the axle is not correctly adjusted or that the axle suspension is defective. This also includes defective and porous rubber bearings.
Important Note! An inaccurate axle geometry and defective components have a negative effect on driving performance and influence radar as well as camera systems.
3 - Camera: Look at the camera. Maybe you are not the first to replace the windscreen? Maybe the camera is not correctly mounted in the appropriate bracket? For camera modules where the lens is covered by a glass plate, a sensor saver pad must be used between the windscreen and the camera module. If the gel pad is not used, the camera will not be able to detect the target panel correctly.
4 - Lighting: Check the lights by switching through the individual lamps. Although modern vehicles perform a cold diagnosis, a visual inspection is still important to check the individual lamps under load.
5 - Loading: Check the vehicle loading by looking inside the boot. If the customer is having any tyres changed, they may have loaded them in the boot. This can cause false measurements when setting up the calibration system. Make sure that the vehicle is set up for day-to-day driving before calibrating.
6 - Shock Absorber: Visually check the tightness of the shock absorbers with a torch You can recognize a defective shock absorber when it is wetted with oil or when there is a lubricating film on its surface. In the case of air suspension, the diagnosis is not quite so simple. In this case a defect can only be detected if there is a clear difference in the height of the shock absorber.